Core Series Roughness on Print - Interior Glass Cleaning
Print Created by: Joel HrachovecCore Series Cleaning the Optical Glass
Overview
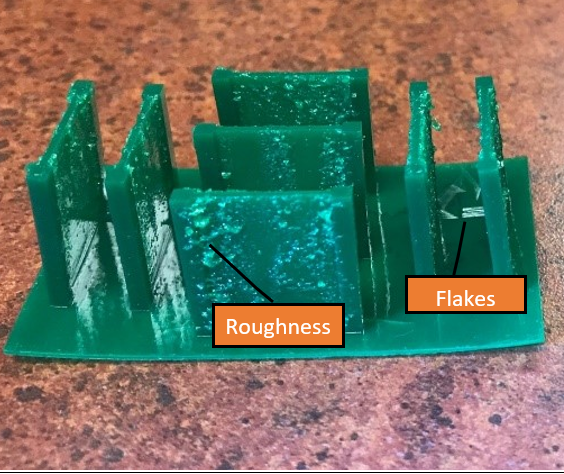
The Core series printers utilized a precision light engine and optical glass to achieve high detail prints. If your prints show roughness or flakes as shown in the following picture there are three possible causes detailed below.
1. Smears on the Build Chamber Optical Glass.
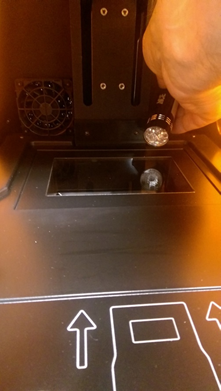
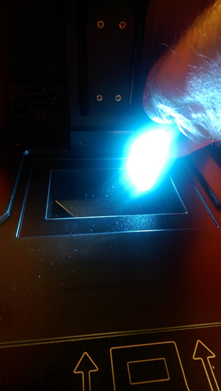
Place a flashlight at back of the optical glass as shown in Picture 1. Shine the light across the surface of the glass from the backside of the glass as shown in Picture 2. Examine the entire window. Very small smears or haze can significantly impact print quality.
Tables can't be imported directly. Please insert an image of your table which can be found here.
|
(Picture 1) Flashlight placement |
(Picture 2) Flashlight will expose smears |
Removing smears on Build Chamber Optical Glass.
 (Picture 3) Interior glass window.
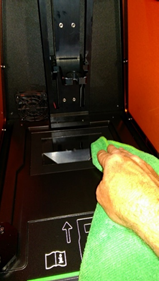
Large spills and resin drips can be cleaned using Isopropyl Alcohol (85% min), but the final cleaning of the glass optics must be done with a clean, dry microfiber cloth. Do not use paper towel.
- Reinspect the optical glass using the flashlight. If smears or haze persist increase the pressure using a clean microfiber cloth.
2. Smears on the bottom of the DuraVat optical glass window.
Inspect the DuraVat bottom optic glass window. Remove all haze and smudges using a clean microfiber cloth. Isopropyl Alcohol (85% min), can be used to remove resin.
3. DuraVat Not Recharged
The DuraVat requires recharging after each print. If the recharging process is not completed, roughness can appear on the print. Please refer to the Core Series Post Printing and DuraVat Cleaning Procedures for instructions.
Compare the difference between prints on a smudged interior glass and a clean interior glass.
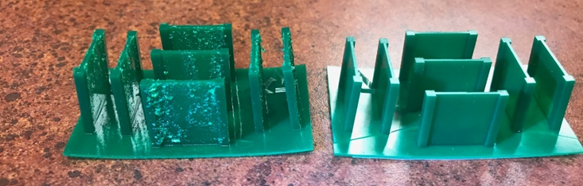
Picture 4 Left - print results with smears and/or smudges on window surface.
Right – print results after cleaning window
If roughness or flakes continue to be seen on prints you can verify optic clarity by downloading the appropriate RoughTest file and print per the Users Manual section 9.12.
Click the appropriate download file link.
| 530 | 550 | XL & Ascent | |
| Create Legacy | RoughTest530.cpj | RoughTest550.cpj | |
| B9Create |
1. The following message window will open.

2. Select download to begin downloading the file.
If Rough surface finish is observed either the Build Chamber and/or DuraVat optic glass needs to be cleaned.
pdf (6 KB48) J Joel is the author of this solution article.
