B9Creator Projector Troubleshooting and Bulb Replacement
Print Created by: Joel HrachovecB9Creator Projector Troubleshooting and Bulb Replacement
Summary
The B9Creator projector bulbs are tungsten filament.Therefore, lifetime can vary from bulb to bulb.When the MSM exceeds a 2.8 level is an early end of life indication.
A bulb which has blown up inside the projector should not be replaced, the projector will need to be replaced.
If your projector is not able to turn on, blinking an error code, or is causing a projector abort error in the software. With your printer idle, run through the suggested solutions below.
Troubleshooting
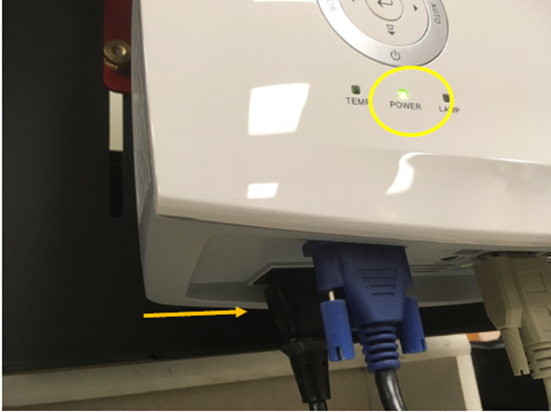
1. With the projector still attached to the machine, unplug the power cable from the projector for 1 minute and wait for the power light on the projector to go out. Then plug the power cable back into the projector as shown below:
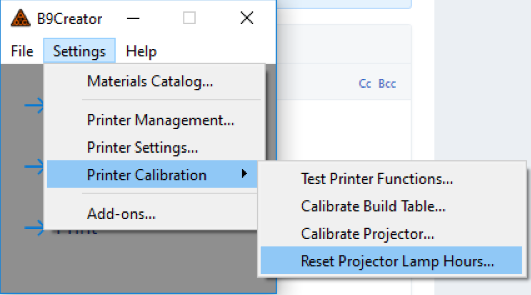
2. Open the B9Creator PC software and navigate to Settings > Printer Calibration >Test Printer Functions. Complete steps 1-7. Note if you see “Command: A061 Failed.” in the status field complete B9Creator “Command: A061 Failed” Resolution .

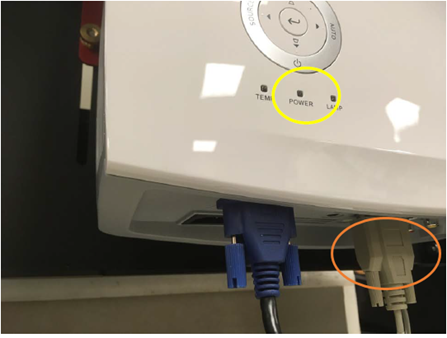
3. Check the RS232 connection (grey cable) is secure at the bottom of the projector and at the PCB.
4. Start a sample print (no vat necessary).Look beneath the Build Chamber and inspect the light coming out of the projector. Only white light should be seen. If other colors are seen, the projector color wheel could be defective. Please contact Support.
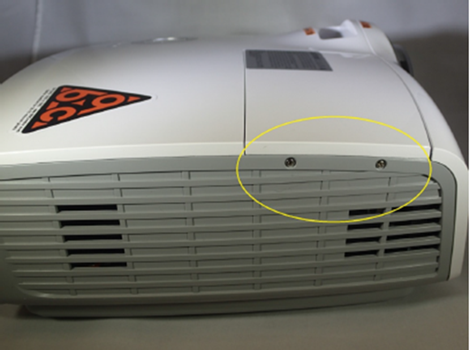
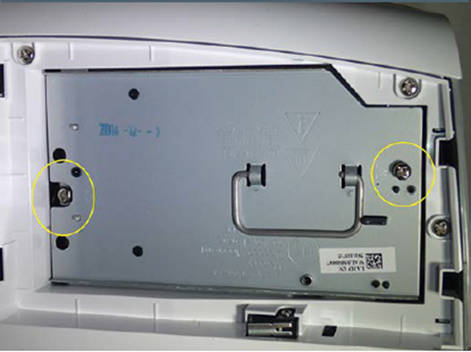
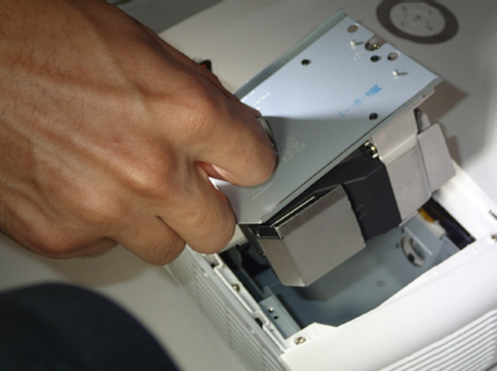
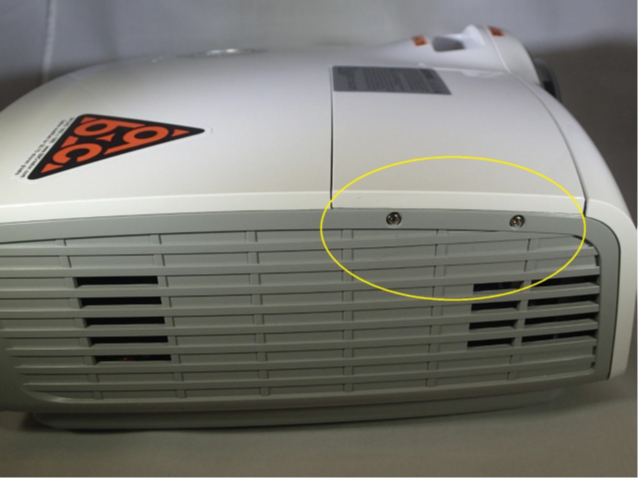
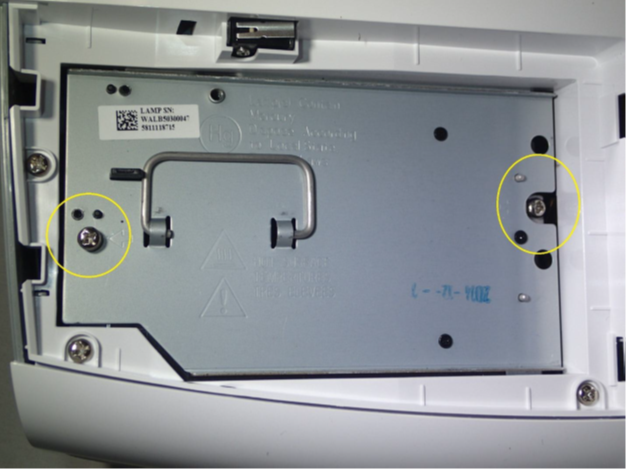
5. Remove the 2 screws for the bulb cover as well as the two screws on the bulb assembly itself as shown in the two photos below.
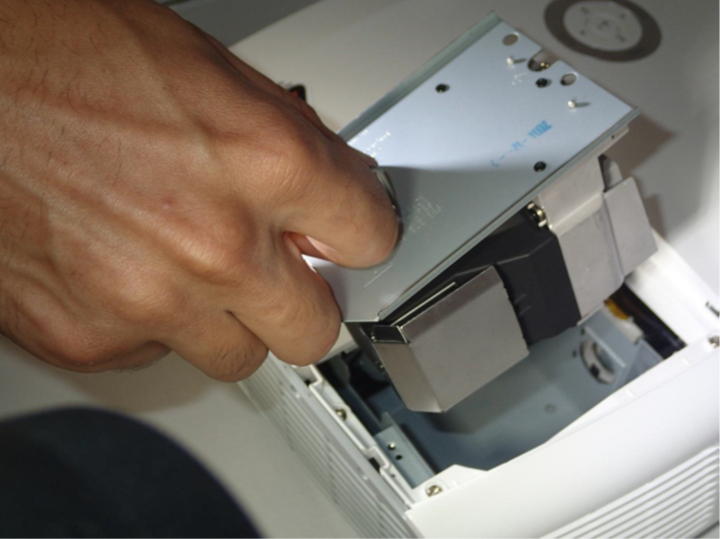
6. Next, remove the bulb assembly and set it carefully to the side. Note: be careful not to touch the glass on the bulb side of the assembly. The bulb removal is not necessary to access the switch in the step 4, but re-seating the bulb can help with some projector errors.
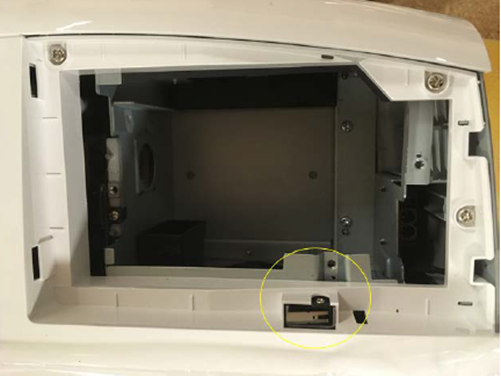
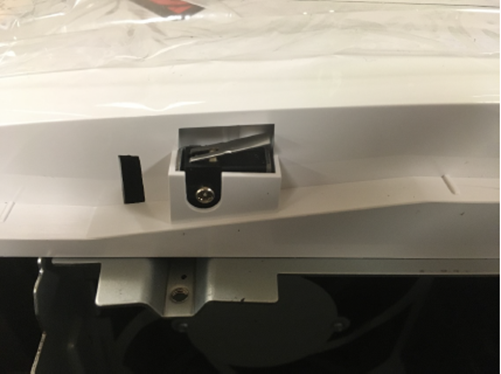
7. Now replace the bulb cover and ensure it engages the switch located in the bulb assembly bay. Do this by listening for a click as you replace the cover. If the switch doesn’t engage you can bend the tab on the switch up slightly to ensure that it will stay engaged when the cover is closed. The switch shown in the second picture is a reference for how the tab should look.
8. Now that you have checked the switch, re-seat the bulb assembly into the projector and tighten both screws. Then replace the bulb cover and re-insert and tighten both screws.
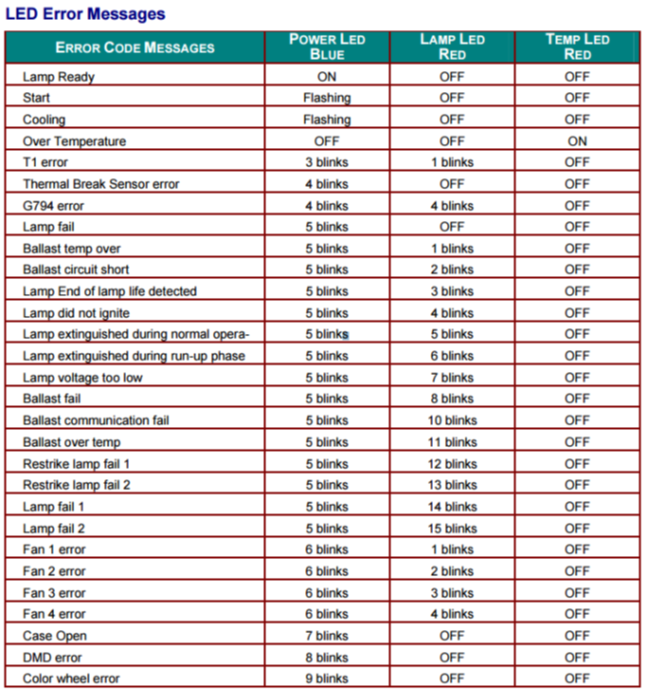
9. If the projector has aborted the print and is flashing an error code, the following chart should be able to identify the cause of the error.
Bulb Replacement Procedure
1. Remove the 2 screws located on the side of the projector.
2. You can now pop off the plastic covering and have access to the bulb assembly. Loosen the 2 screws that hold the bulb assembly.
3. Lift straight up with the small handle attached to the lamp assembly. You can now insert your new lamp and follow the reverse process and tighten all the screws.
4. Reset the Lamp Hours
pdf (1010 KB)
Updated by Matthew Glover 12/2/22