This example uses a Core 550 to explain how to update printer firmware, but the process is the same for all B9Creations 3D Printers
Core Series Updating the Printer Firmware
1. When the printer and computer running the B9Create Software are NOT connected via a network:
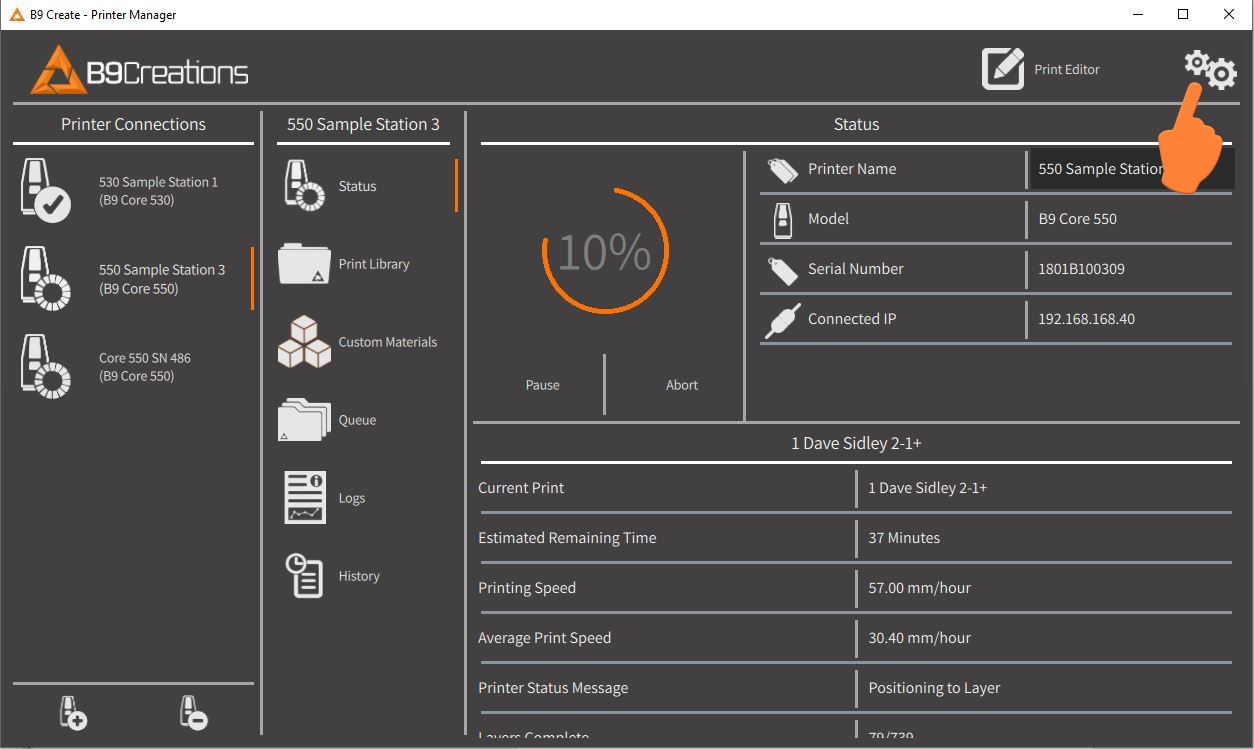
In the Print Manager screen, select the ‘Settings’ icon.
A window will open displaying ‘Latest Firmware Version: xx’. Scroll to the bottom and select ‘Show Firmware Update File’.
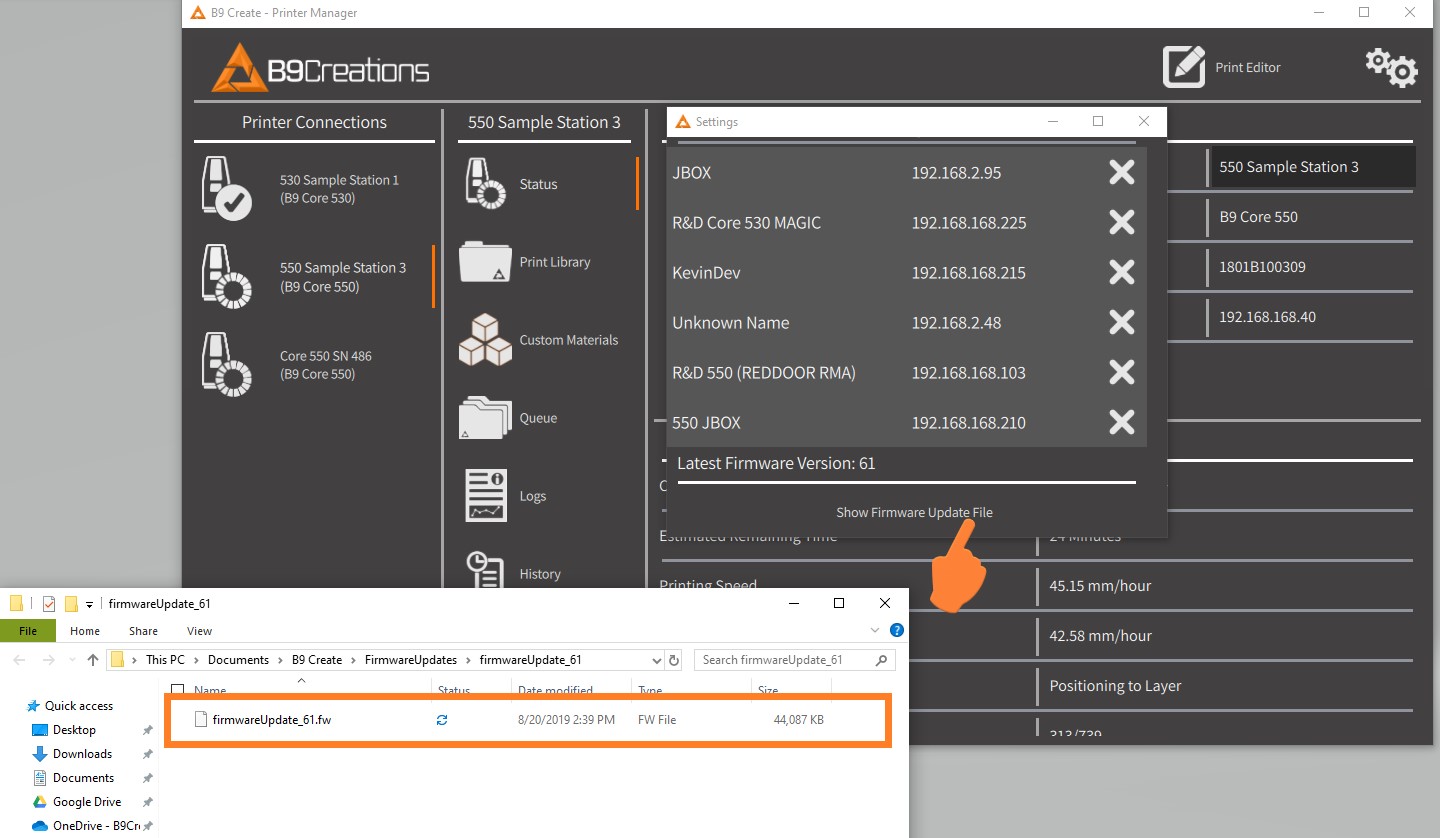
Transfer the file to a USB drive and insert into your printer. On the Printer main menu, select “USB Transfer”, find the file on the USB, and select the firmware file. The firmware will automatically begin to update.
When the Printer and PC running the B9Create Software ARE connected via a network:
When a new firmware version is released, you will see an orange notification bar indicating “Update Firmware” in the Print Manager screen.
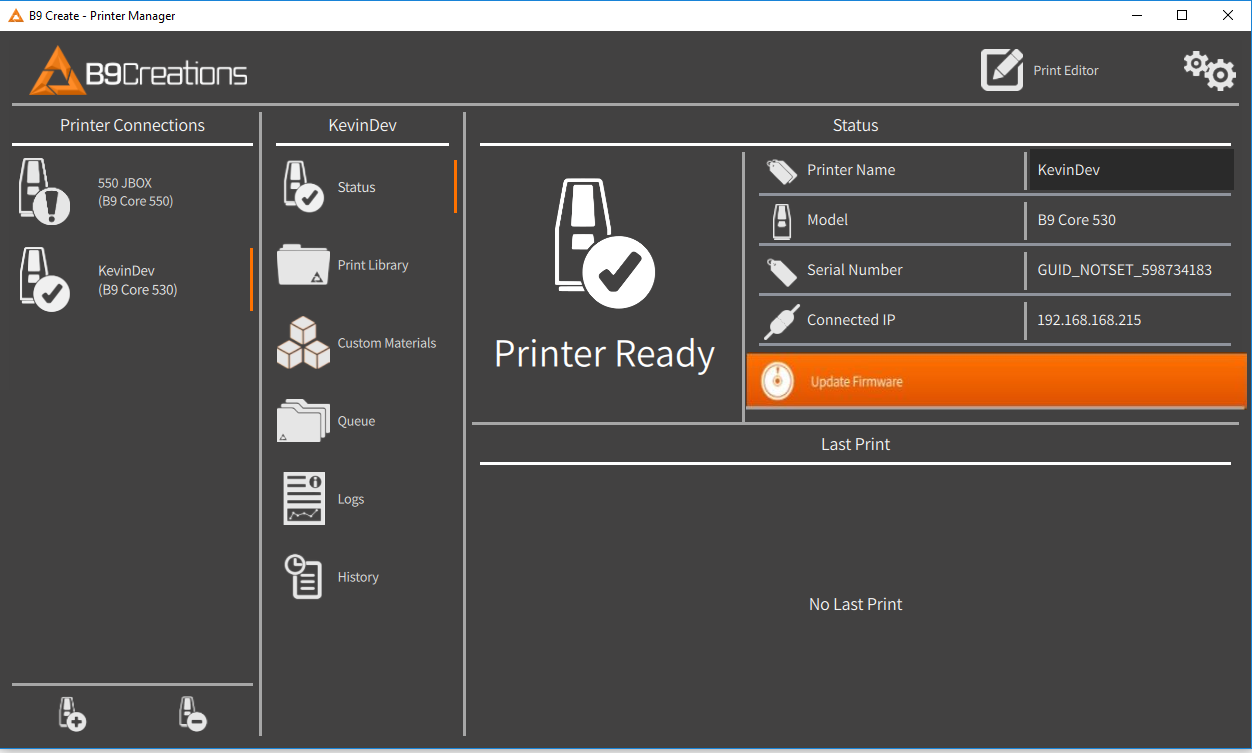
2. Select the “Update Firmware” notification to update printer firmware to display the latest version. Printer must be in a “Printer Ready” state.
3. Go to the printer to verify the firmware update by selecting Settings> Machine Info.