B9Creator Windows 10 Computer Display Settings
Print Created by: Joel HrachovecB9Creator Computer Display Settings
The following setup is for Windows 10. Please visit Instructional video Operating System Display Setup for earlier windows operating systems.
1. Verify the dpinst-xxxx dD .
river has been installed2. Assure your projector is connected to your PC via a VGA cable.
3. The printer USB cable should also be connected to your PC.
4. On your PC home screen select right mouse and select display settings.
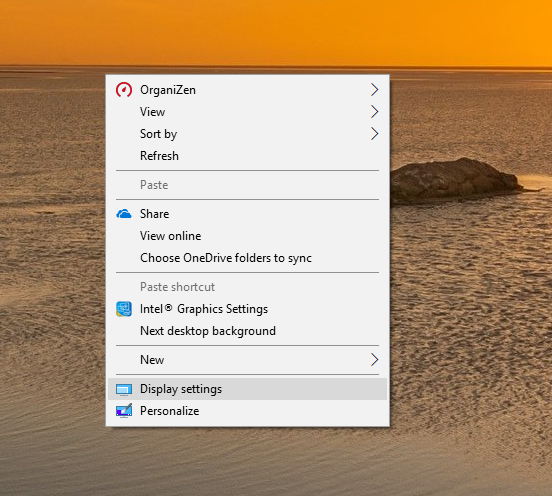
5. The following will be displayed.
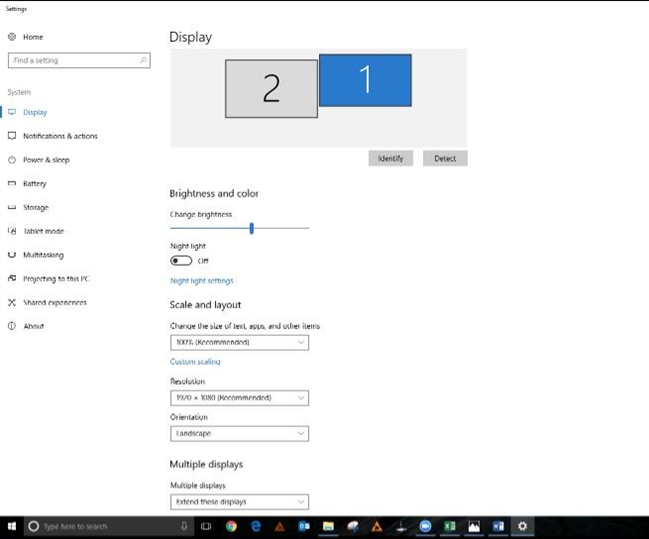
6. Display number 1 should be to the right as shown. If not select and drag number 1 to the right of display #2.
7. Select Display number 1 which should be your computer screen when selected should be highlighted in blue.
8. To verify this is the PC screen select the Identify button and a number 1 should appear on your PC screen.
9. Under Multiple Displays select to “Extend these displays”
10. The display resolution should be selected based on the PC display resolution. (if asked if you wish to keep these setting select “yes”.
11. Now select screen 2 which should be the B9Creator projector.
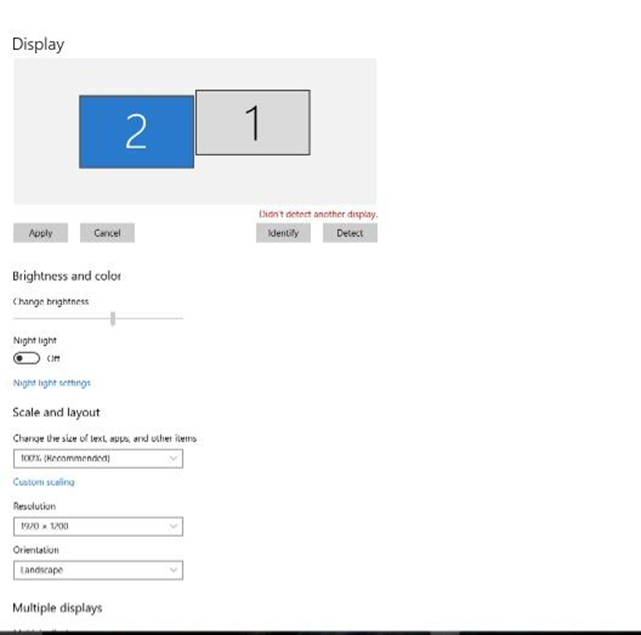
12. Assure the Resolution to 1920 x 1080.
13. Open the B9Creator Software
14. Select Printer Management

a. Verify the Current Configuration correlates to the printer setup.
b. Check the Configuration Resolution is 1920 x 1080 and the appropriate display is selected.
c. Select Finished.
pdf (406 KB) J Joel is the author of this solution article.
