B9Creator Verifying the Print Image
Print Created by: Joel HrachovecThe purpose of this test is to verify the PC is providing the correct image to the projector.
- Remove the Vat.
- Use the normal PC/Projector connections except connect the PC HDMI or VGA cable to an external monitor set to (1920 x 1080 resolution), not the Vivitek Projector. This will allow projection of the Print Image to be displayed on an external monitor. This is used to verify the correct image is being sent.
- Select Print and open the appropriate Calibration Print in the B9Creator folder>Calibrations.
- Select “Begin” on the B9Creator menu and complete Checklist Step 1 – Step 5 and select Create!
- The Projector will turn on, and after the warm up period the printing process will begin. The image will now be projected on your external monitor.
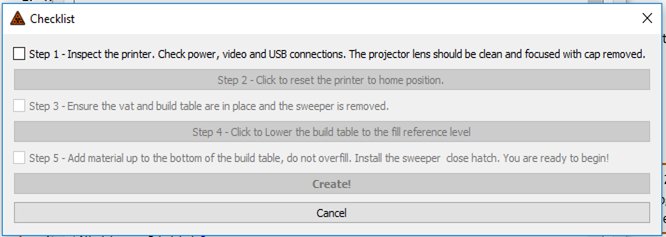
- The first several layers of a test print are the foundation layers shown below left.
 |
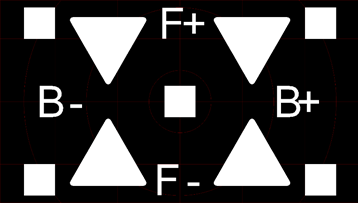 |
| Foundation Layers – about the first 16 layers | Calibration print layers |
pdf (318 KB) J Joel is the author of this solution article.
