B9Creator Projector Calibration
Print Created by: Joel HrachovecB9Creator Projector Calibration
Once we have verified the printers core functionality completing the "Test Printer Functions”, we can begin the projector calibration routine.
To view this procedure as a video: https://www.b9c.com/support/documentation/instructional-videos/projector-calibration
To start the routine, click on the “Calibrate Projector” item under the Settings->Calibrations. The following dialog box will appear:
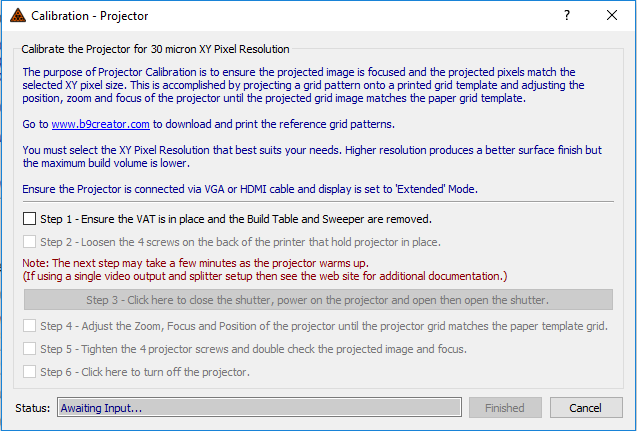
Follow the steps 1-6 in sequence, checking each item once the step is finished:
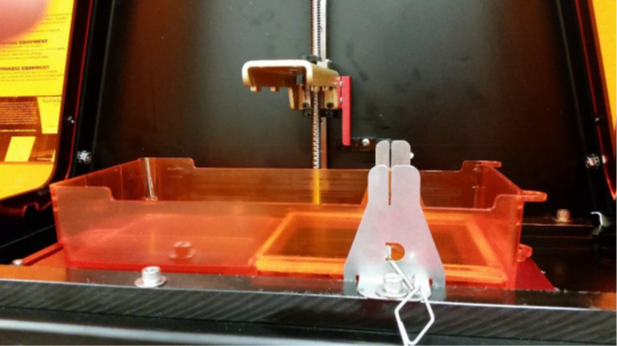
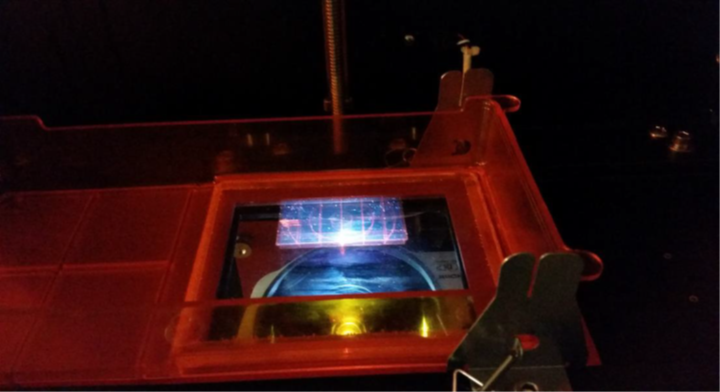
Step 1: Ensure the VAT is in place and the Build Plate and Sweeper are removed:
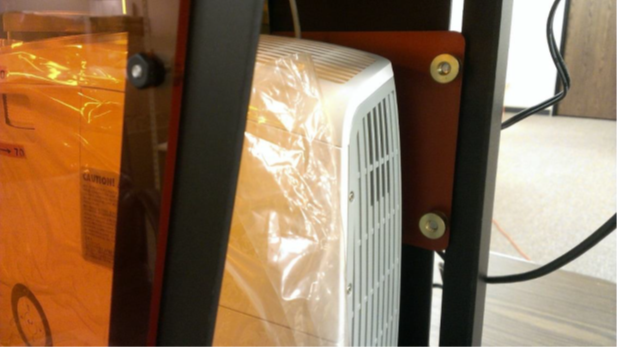
Step 2: Loosen the 4 screws on the back of the printer that hold projector in place.
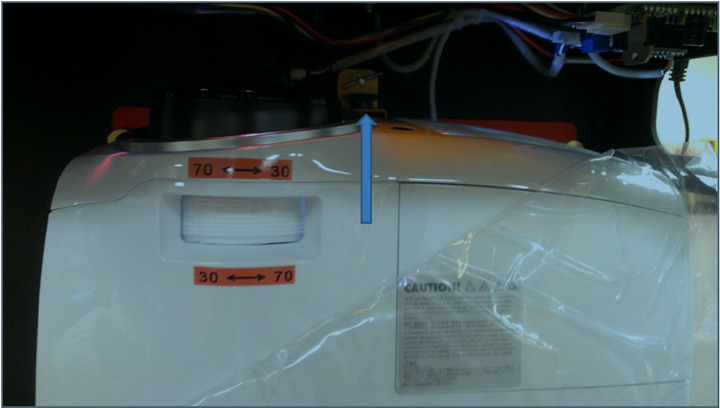
After loosening the 4 screws ensure that the projector is positioned in the correct vertical position corresponding to your desired configuration by pulling out the small pin in the yellow metal pin located above the projector and lifting or lowering the projector until the pin line up with the correct configuration hole. In this example the top hole corresponds to 30u.
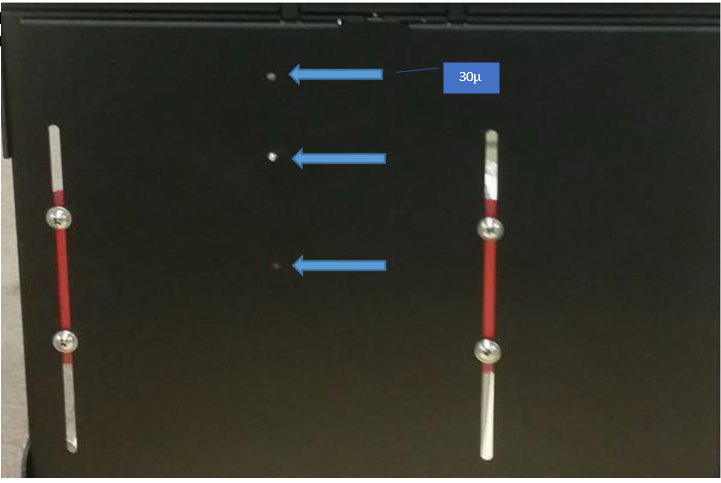
Re-insert the pin and assure it is though the hole, this will keep the projector approximately the right distance from the VAT.
Step 3: Click here to close the shutter, power on the projector and open the shutter: The projector should begin to turn on as the green light begins to blink.
NOTE: Under Rare Circumstances the projector may fail to turn on. If this happens simply repeat the Projector Calibration and return to Step 1.
Step 4: Adjust the zoom, focus and position of the projector until the projection grid matches the calibration grid:
a) First you will need to print off and cut out the calibration grid matching your printer and printer configuration. The calibration grids can be found in Documents/B9Creator or can be downloaded here: http://www.b9c.com/support/documentation. Or you can purchase the recommended B9 Calibration Grids, available at b9c.com.
b) You will then need to position the printout or Calibration guide, so it lays on top of the grid as it is projected:
c) To adjust the image focus, the white zoom wheel and black focus knob need to be adjusted based on the current configuration.
d) First adjust the white zoom knob:
For 30μm XY size:
- The white zoom wheel should be all the way to the left towards the orange “30” mark.
For 50μm & 70μm sizes:
- The white zoom wheel should be all the way to the right towards the orange “70” mark.
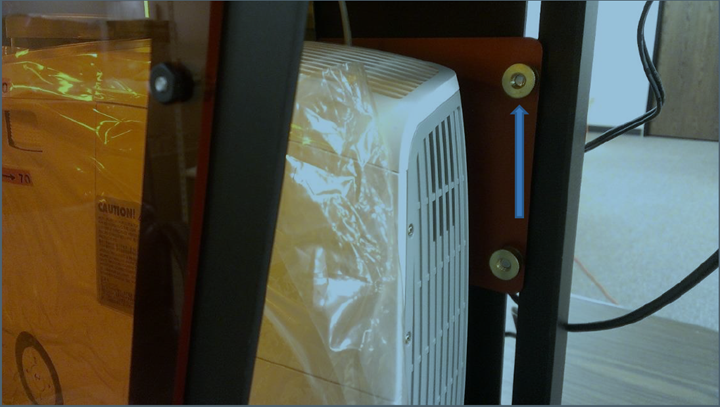
e) Next use the black focus knob to focus the image in on the calibration grid. If you find that the image is consistently too large or small or too large you need to adjust the thumb screw again to adjust the image size. Near the T- pin, there is a thumb screw which can move the projector up and down by about ¼’’.
If you tighten the thumb screw, it moves the projector upwards. If you loosen the thumb screw the projector moves downwards. As the projector raises, the image gets smaller. As the projector lowers the image gets bigger. The thumb screw allows for finer adjustment of the image size to match the calibration grid:
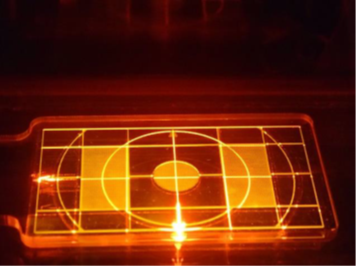 |
 |
The Picture on the left shows the image is not zoomed properly, right shows zoomed properly.
NOTE: If you’re using the printed Calibration Sheet may not be the right size! Some (2D) printers aren’t very good at printing to scale. If you can’t seem to get the projected grid to line up, you may need to verify your calibration sheet with some calipers and ensure that the squares are 10mm x10mm. Calibration Grids, available at b9c.com are recommended for the best possible calibrations.
Step 5: Tighten the 4 projector screws and double check the projected image and focus:
If the projector is properly focused on the calibration grid you should see the grid come into focus and line up with the sheet as shown above. Place some tack (puddy) to assure the focus ring does not get accidently moved.
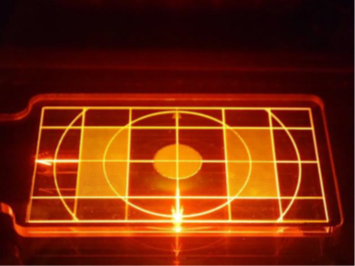
A properly focused image is shown below:
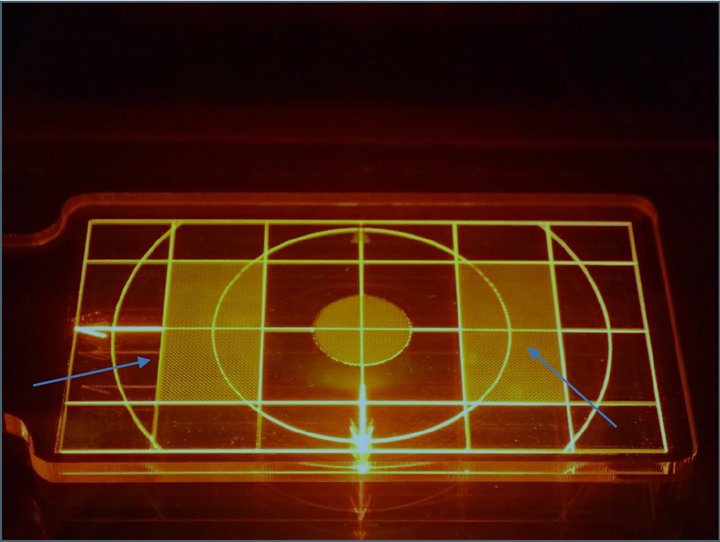
The squares and circles are illuminated. The arrow is sharp and clear.
Once focused, tighten the 4 projector screws to fully secure the projector:
Step 6: Click here to turn off the projector. The project should turn off.
- Finally click the finished button to complete the projector calibration.
