B9Creator PCB Board Replacement
Print Created by: Joel HrachovecB9Creatopr PCB Board Replacement
Tools Needed:
- A set of small Regular screwdrivers
- A large Phillips screwdriver
1. Disconnect all of the 4 cables that connect to the printer and projector and remove the vat, sweeper, and build table from the printer.
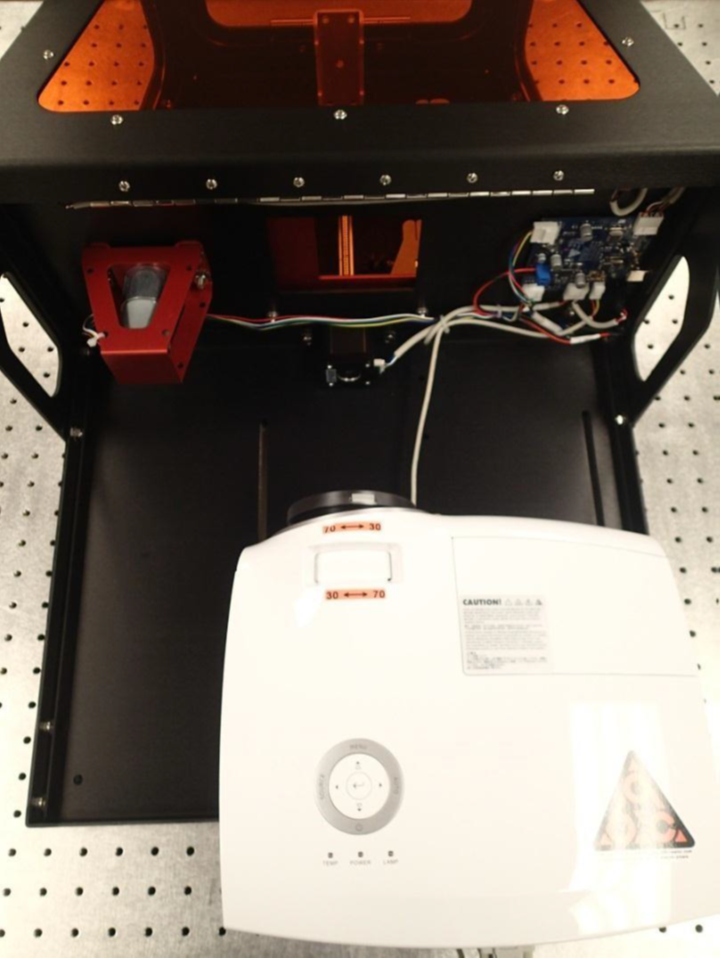
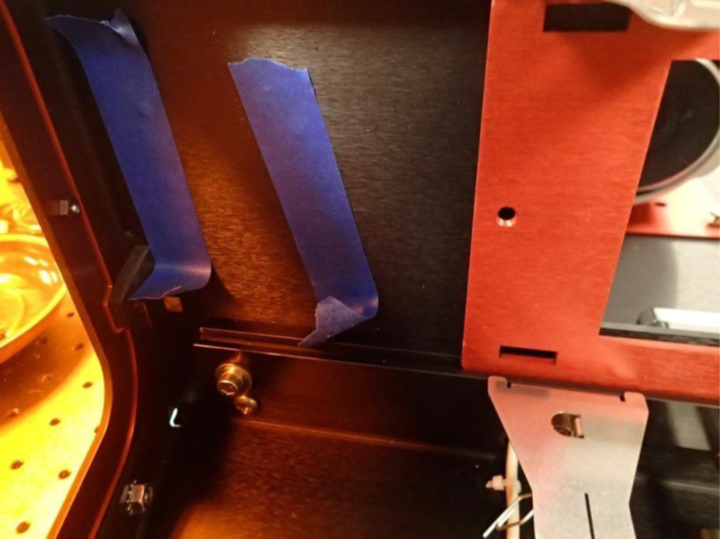
2. Loosen the 4 screws that hold the projector in place in the back. Then remove the T-pin and lower the projector to the 70 micron position to give adequate working space.
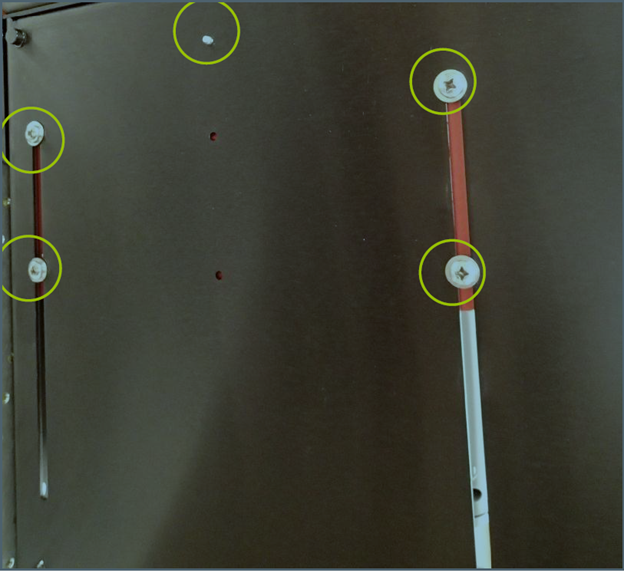
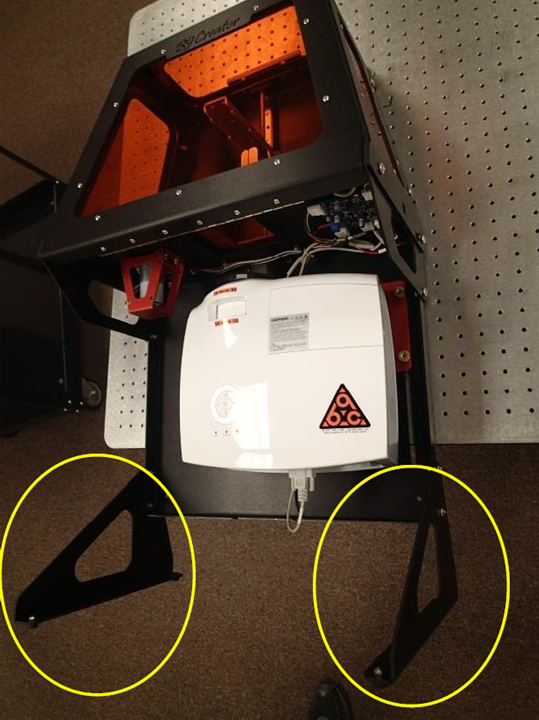
3. Lay the printer on its back on a flat surface and remove the two feet. PCB Replacement
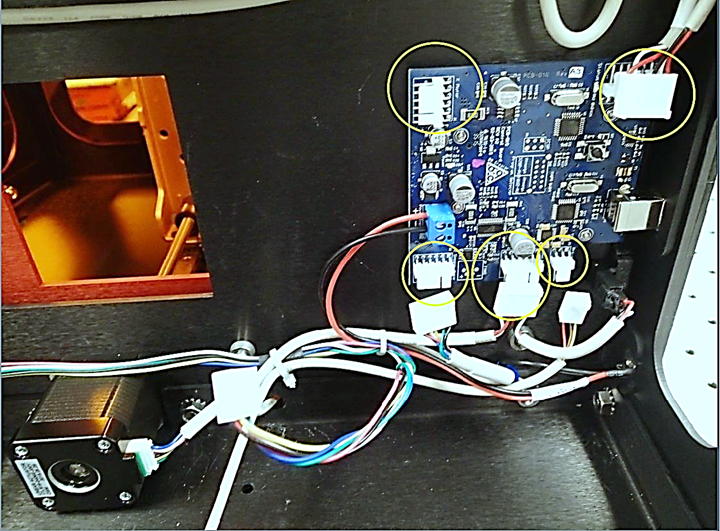
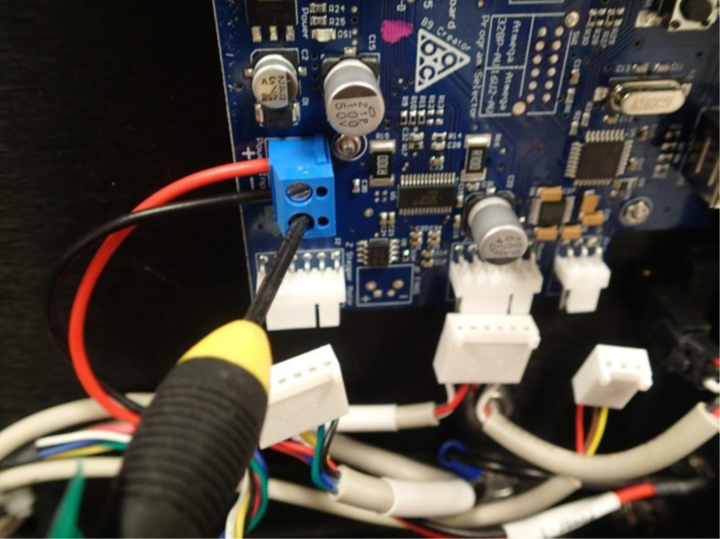
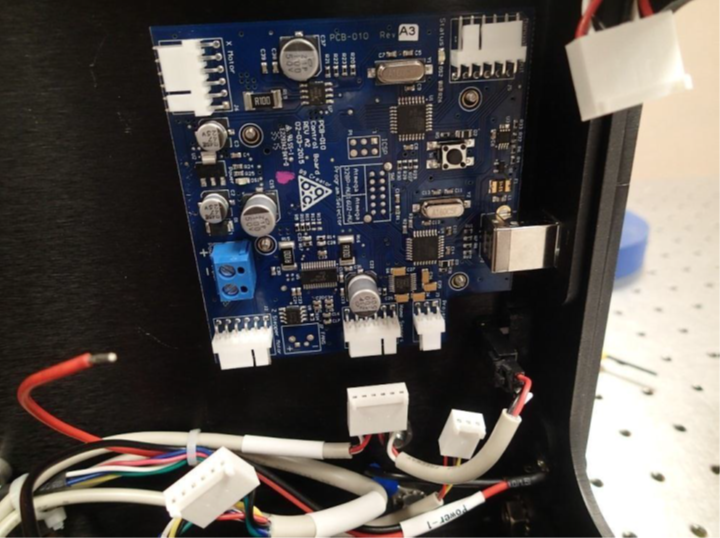
Step 4: Remove all 5 connectors and the red and black power wires from the PCB.
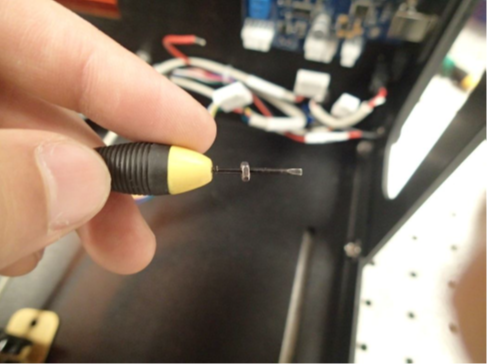
5. Remove the four small nuts that hold the PCB to the x-axis. These are very small, be careful they are not lost.
It can be helpful to have someone hold the hatch open during this step.
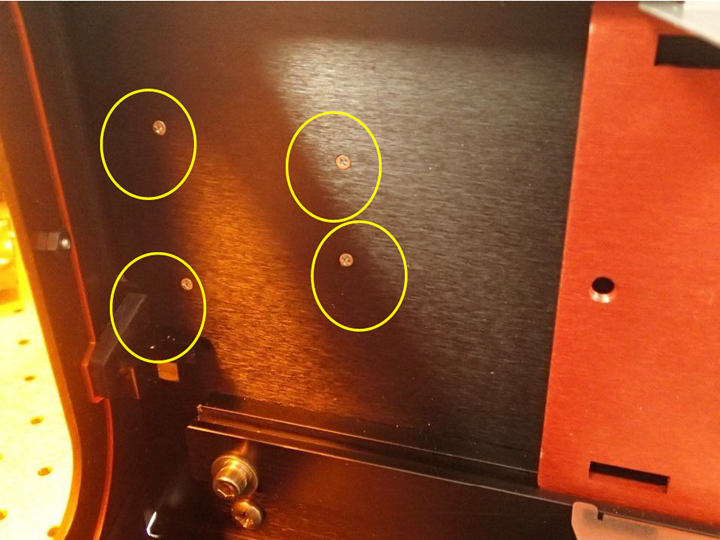
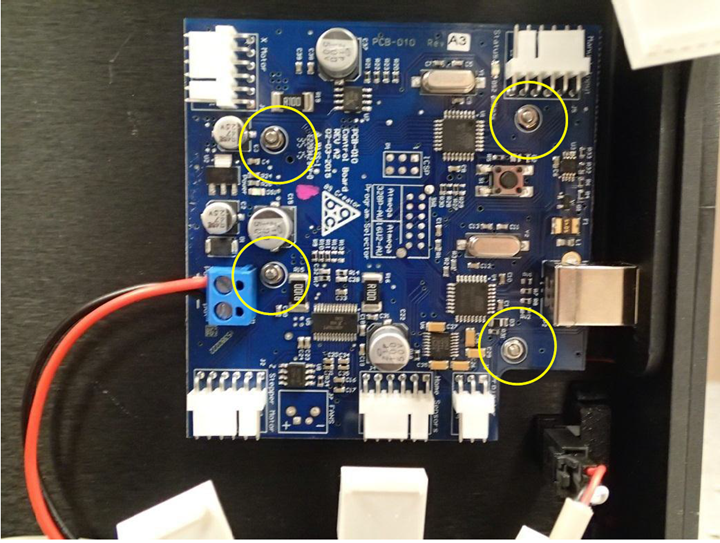
6. As you remove the PCB board, note that there are 4 spacers on the ends of the 4 screws, once again be careful not to lose these as you remove the board.
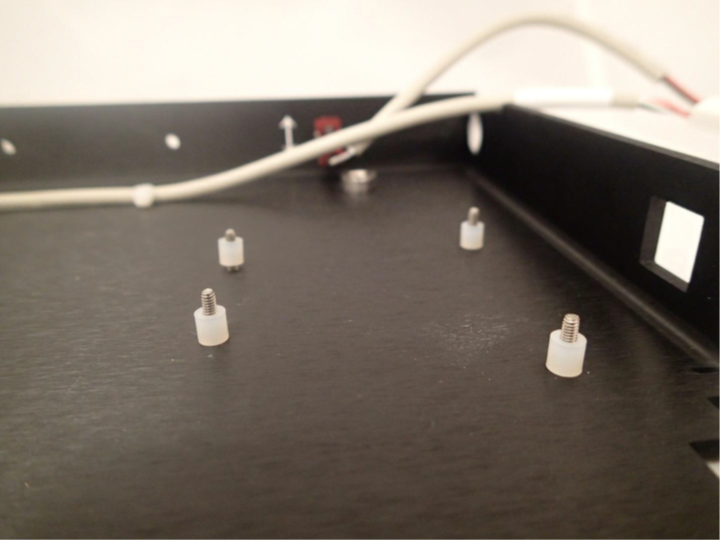
7. Once the board is removed, put some masking tape on the screw heads on the other side of the x-axis plate. This will keep the screws from popping out as you put on the replacement board.
8. Line the replacement board up with the 4 screws and spacers, and set it into place.
9. Put a single nut on the end of a small screwdriver, then line it up with the threads of the screw and attach the nut.
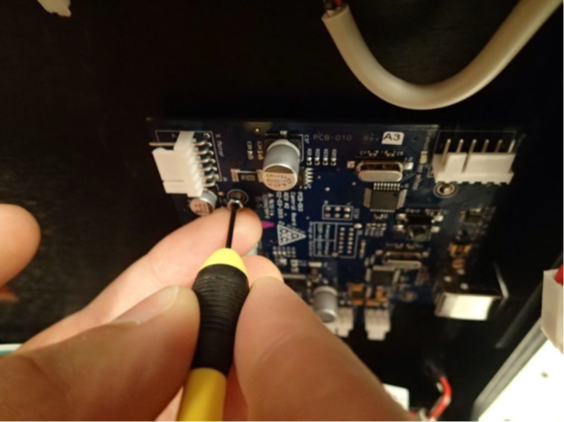
10. Once the nuts are on loosely, you can take the tape off of the screws on the other side and tighten them down snug.
11. Now to reverse through the steps. Reconnect the 5 connectors and two power wires to the PCB.
- Re-attach the feet to the machine and stand it up
- Move the projector back to the desired resolution height.
- Insert the T-pin and run a projector calibration to ensure that your projector calibration is still correct.
- Calibrate your build table
pdf (1.35 MB) J Joel is the author of this solution article.
