B9Creator Build Table Calibration Process (using resin)
Print Created by: Joel HrachovecB9Creator Build Table Calibration Process
Summary
This document explains the process to calibrate the B9Creator Build Table.
Things to Know
- The purpose of the Build Table Calibration is to ensure that the Build Table rests flush against the clear layer inside the Vat, referred to as PDMS.
- The Build Table Calibration Process must be repeated any time you switch to a new Vat or re-coat an existing Vat. This will account for any variations occurring in the PDMS layer.
- The Build Table must correctly contact the PDMS layer to ensure the first layer of the print will attach to the table when a print begins. A successful print starts with successful calibrations.
- For a video tutorial on this process, please visit our website at https://www.b9c.com/support/documentation/instructional-videos/build-table-calibration
- Note: This document uses emerald resin, but the process will work for any resin.
Process
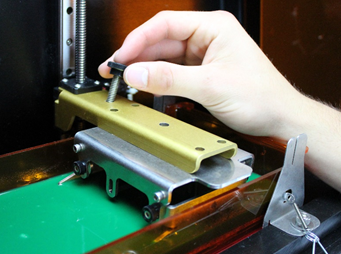
Remove the Build Table from the Z-motor arm by removing the thumb screw from the top of the Z-motor arm as shown below:
From the Main Menu of the software, go to Settings>Printer Calibration>Calibrate Build Table. The following calibration dialog will appear to guide you through the steps necessary to complete this process:
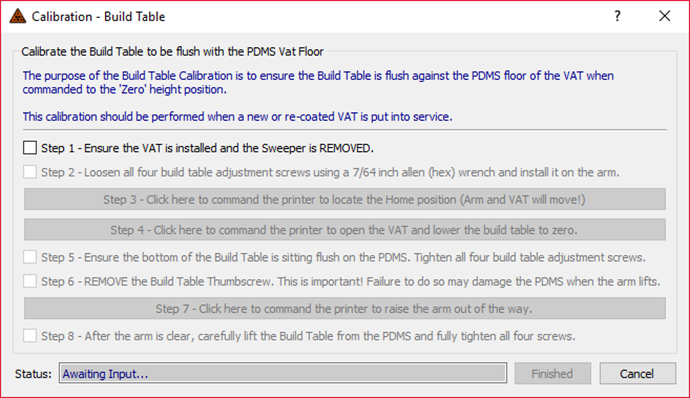
Step 1: Ensure the VAT is installed and the Sweeper is REMOVED.
Note: While it is possible to complete this process while the Vat is empty, for the best results, we recommend using a Vat with resin in it.
It is very important that the sweeper is REMOVED! If the sweeper is left in, it will make it difficult to tighten the Build Table screws later in the process!
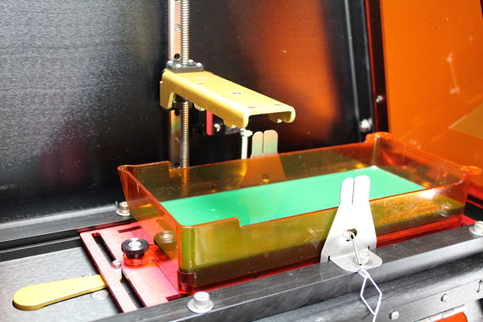
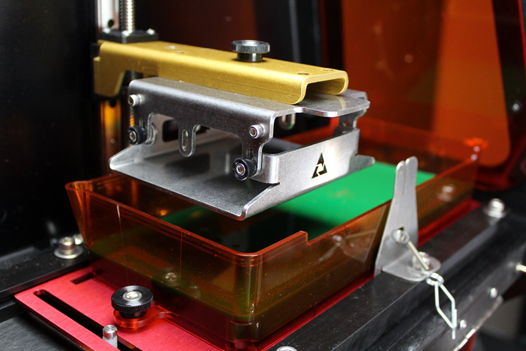
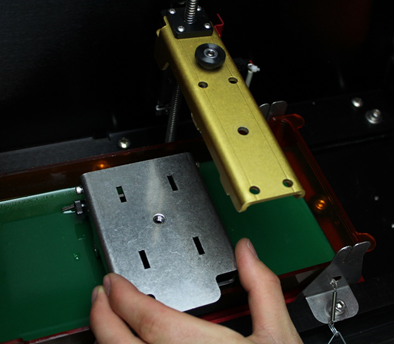
Below is an image of a machine with the Build Table and sweeper removed:
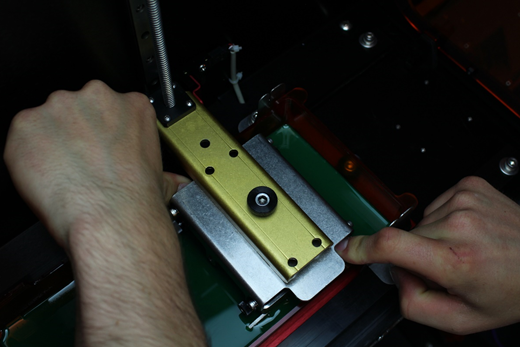
Step 2: Loosen all four build table adjustment screws using a 7/64 inch Allen (hex) wrench and install it on the arm.
The adjustment screws are shown in the figure below:
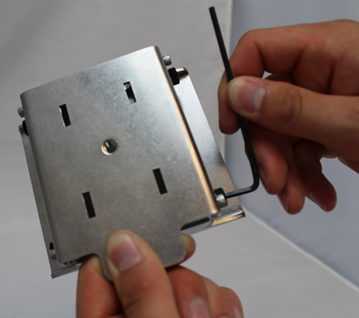
Do not remove the screws completely. They should be loose enough to allow the Build Table attachment to slide up and down freely within the housing. Reattach the Build Table to the Z-motor arm using the thumb screw. Once attached, verify that the Build Plate is fully extended in the housing, and the thumb screw is firmly tightened as shown in the picture below:
Step 3: Click here to command the printer to locate the Home position (Arm and VAT will move!)
Upon clicking on Step 3, the Build Table will find the printer’s “HOME” position. The motors may engage to adjust the position of the Vat and Build Table. When in the “Home” position, the Vat will be positioned with the window to the right side of the enclosure and the reservoir directly over the projector lens. This is considered the closed position. The Build Table will be just above the Vat as shown in the picture above. The B9Creator uses this position as a reference for starting prints.
Step 4: Click here to command the printer to open the VAT and lower the build table to zero.
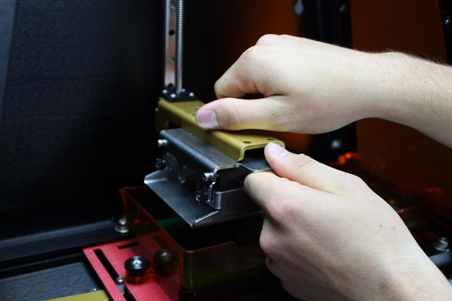
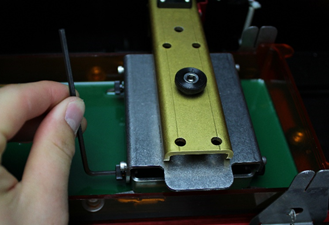
Upon clicking on Step 4, the VAT will slide so the PDMS is beneath the Build Table. This is considered the open position. The Z-motor will lower the Z-motor arm, causing the Build Plate to move within the housing, until it rests against the PDMS. With the Build Plate resting on the PDMS, apply firm downward pressure with your fingers on the edges of the build plate, to ensure the plate is fully flush against the surface of the PDMS as shown below:
Step 5: Ensure the bottom of the Build Table is sitting flush on the PDMS by looking at the underside of the PDMS window. If the Build Table is flush, tighten all four build plate adjustment screws.
The image (seen on the next page) shows what is considered properly flush against the PDMS.
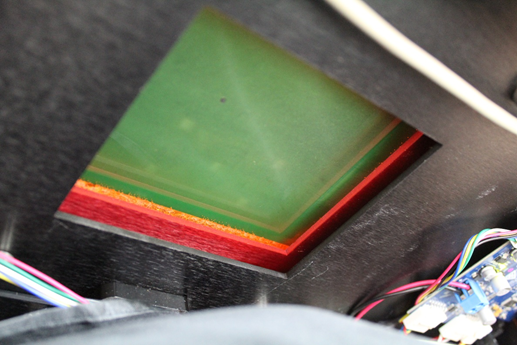
If there is more resin on one side than the other, it will be necessary to apply pressure on that side while tightening the Build Table’s screws.
If the Build Table is still not flush, remove the thumb screw and raise the Z-motor arm using the Z-axis toggle switch. With the Z-motor arm out of the way, gently lift the Build Table from the floor of the Vat, to prevent damaging the PDMS (See Step 6). Restart the Build Table Calibration Process.
If the Build Table is flush, tighten all four build plate adjustment screws.
Do not fully tighten each screw completely. The screws should be slowly tightened bit by bit while checking underneath that the Build Table is still flush. Beginning in one corner, slowly tighten the screw until you encounter resistance, then repeat for the next screw, moving around the build table until all 4 screws are completely tight, while checking that the Build Table is flush.
Check once more if the build table is flush. If it is not, loosen the 4 screws once more, apply pressure to it, and repeat this step.
Step 6: REMOVE the Build Table Thumbscrew.
WARNING: It is important that you remove the thumbscrew before lifting the Z-motor arm. Failure to do so may cause the PDMS layer to separate from the inside of the Vat or otherwise damage the PDMS layer.
Remove the thumbscrew and set it to the side or insert it into the hole in the Z-motor arm near the back of the printer as shown below:
Step 7: Click here to command the printer to raise the arm out of the way.
This step will move the Z-motor arm out of the way to provide clear access to the build table. The Z-motor arm will separate from the build table as it rises.
Step 8: After the arm is clear, carefully slide the Build Table from the PDMS.
Finally, re-attach the build table to the Z-motor arm using the thumbscrew.
Once the Build Table is attached to the Z-motor arm, you have completed the Build Table Calibration Process.
If you have any questions or comments regarding your B9Creator, please create a ticket.
pdf (948 KB) J Joel is the author of this solution article.
